I'm going to show you my workflow and how I edit my videos x10 times faster than before, I am a Flutter Developer and I make Tutorials. And I have the script that I used to record my videos. And after that, I organize my video. Each video has a code folder, the memes folder, and the videos that I'm going to use in my video, And of course, my original video and sound, which I record sound separately. I am gonna show you the fastest ways that you are going to edit your videos.
I'm going to open my Adobe premier and create a new project, now I want you to focus with me. I'm going to show how I use Adobe Media Encoder and Adobe Audition to edit all edit my clips.
let's import our project media. After that, I'm going to sync my voice with the video. Now I have my clip, The Normal way that you are going to use a Razer Tool and just cut it manually. And this is going to take ever!!!
STEP1:
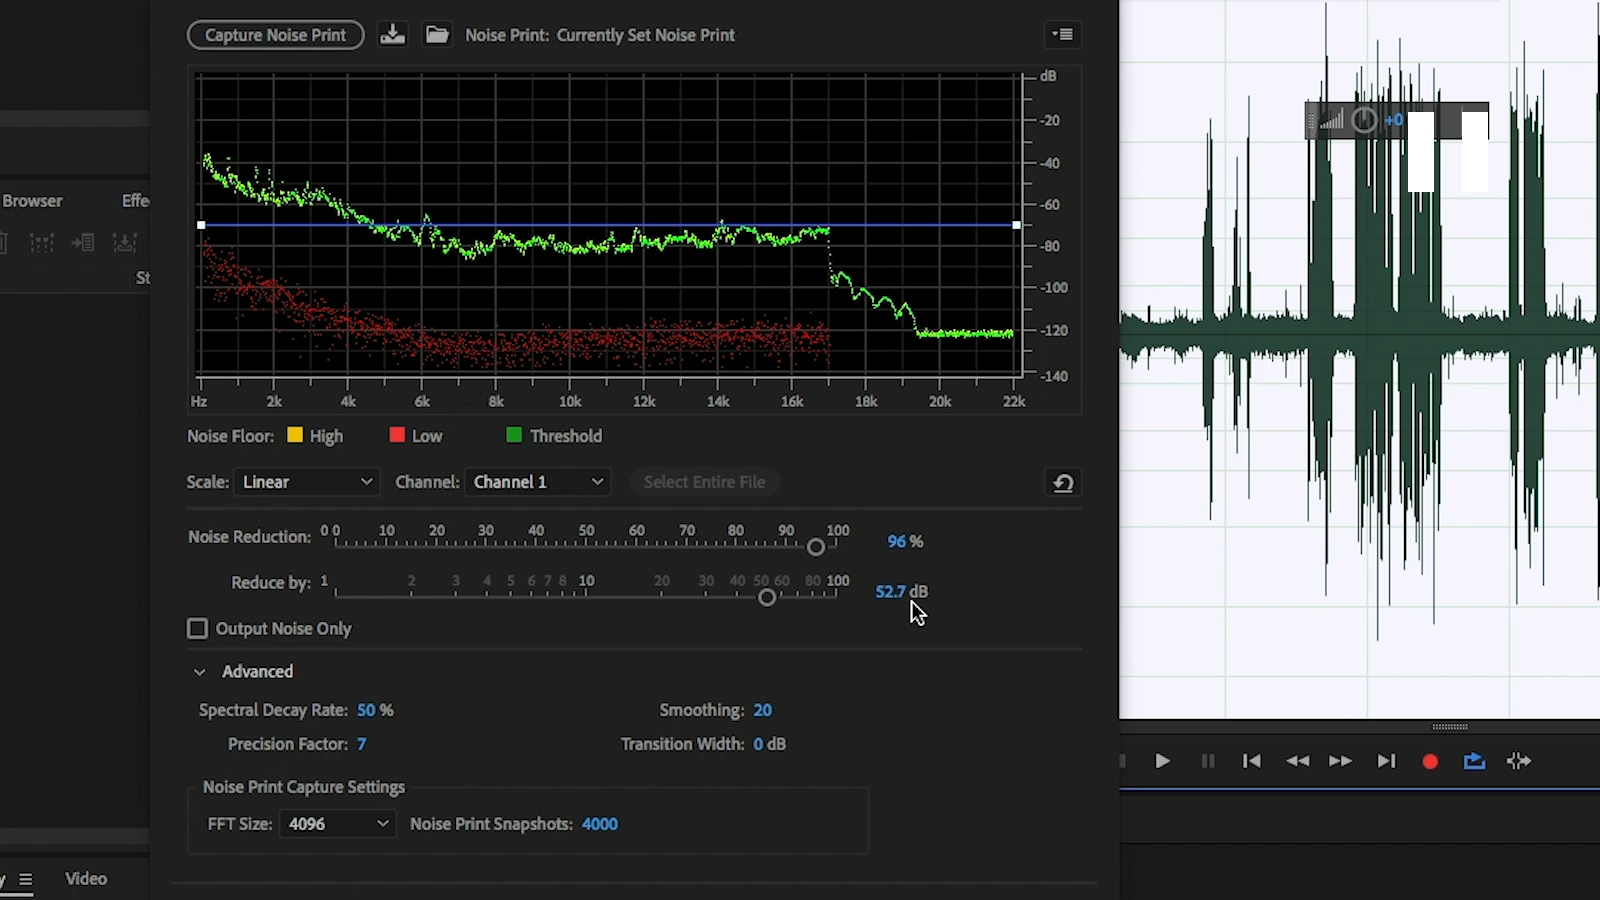
But first I'm gonna edit the clip in Adobe Audition, So I get rid of the background noise.
So I going to select some areas that I don't speak in and press (shift + P) and press, And then (command on shift + P) and select all and you can select your settings as mine in the video, my noise disappears at 50 DB, and you can set this setting as you want.
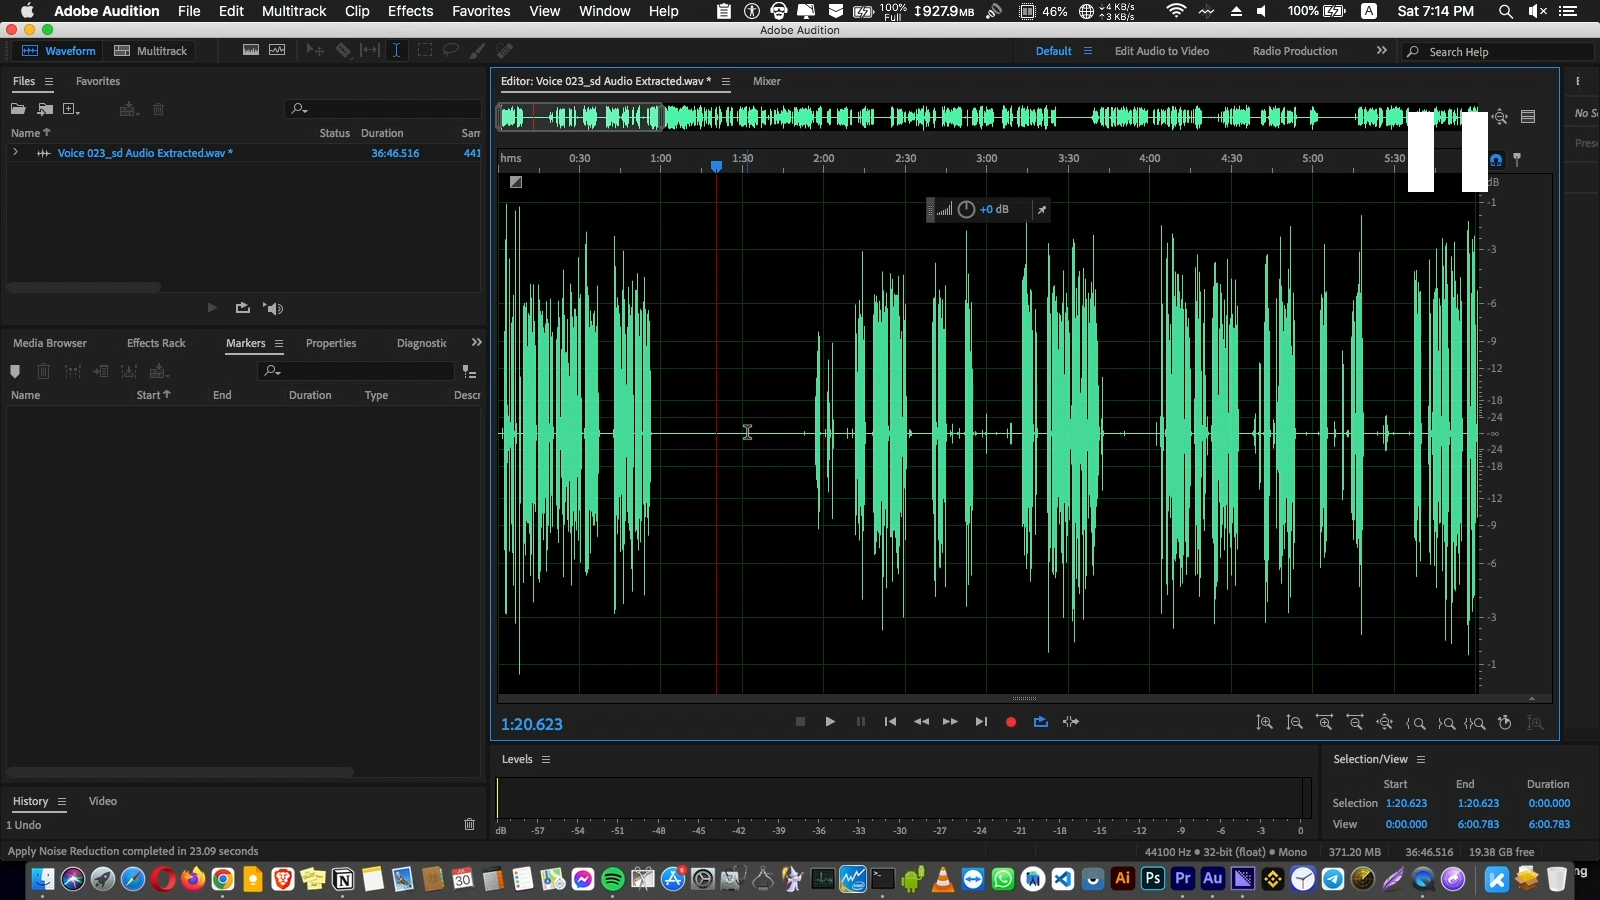
Now we have no noise in the background. And this is going to help us to delete the silence areas, we are going to Auto Delete Silence in my video. let's save this record here or this audio to just update it here and remove this noise.
STEP2:
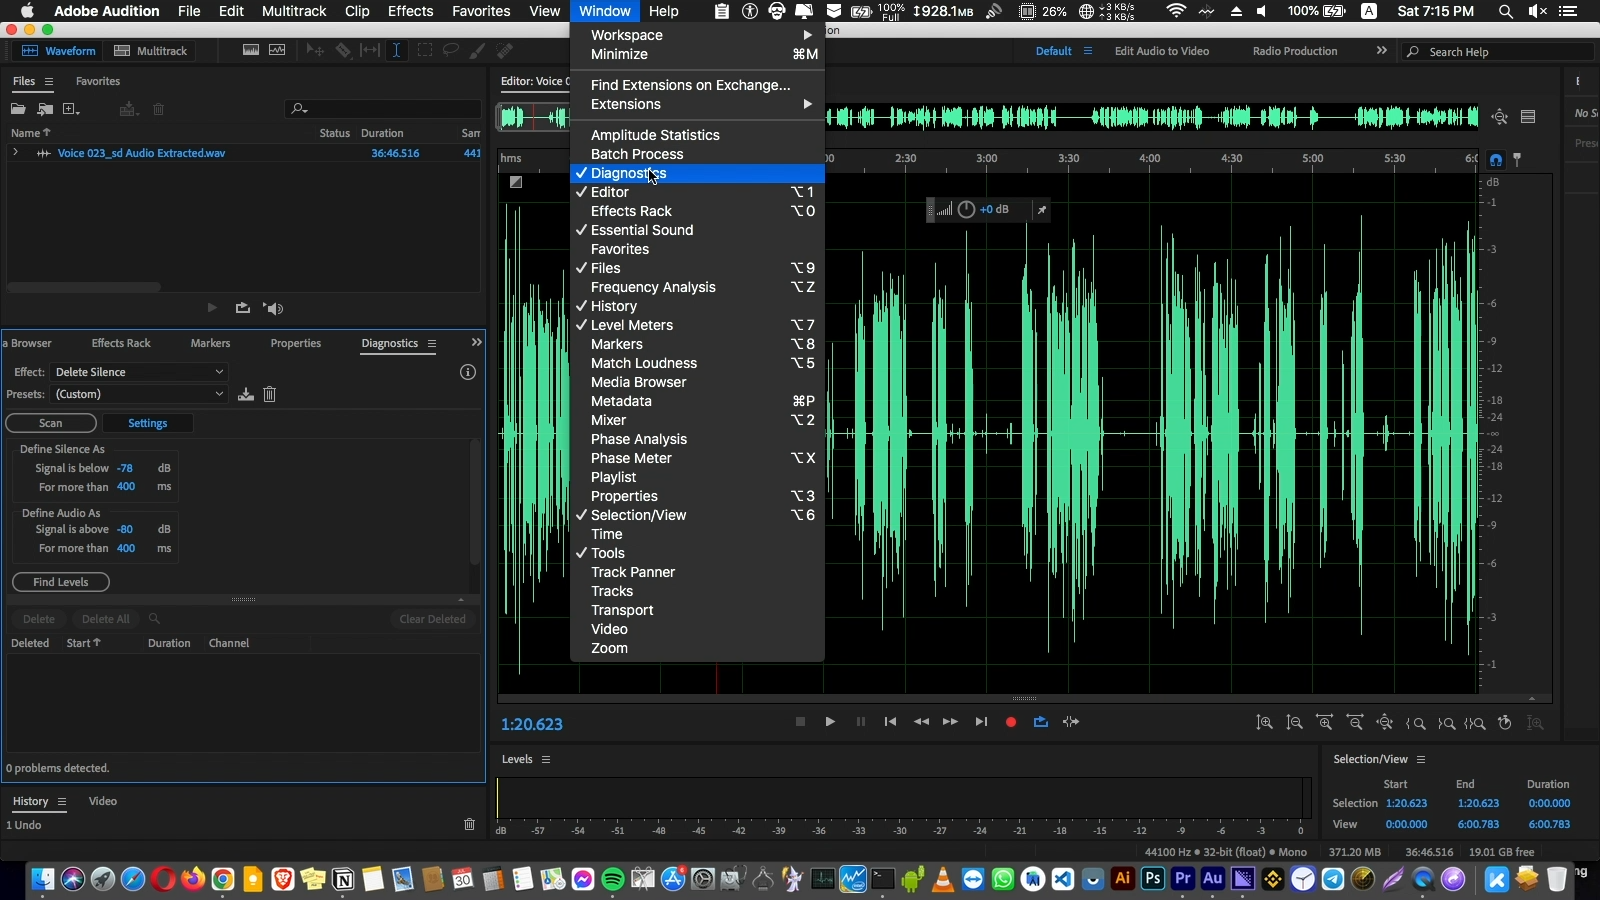
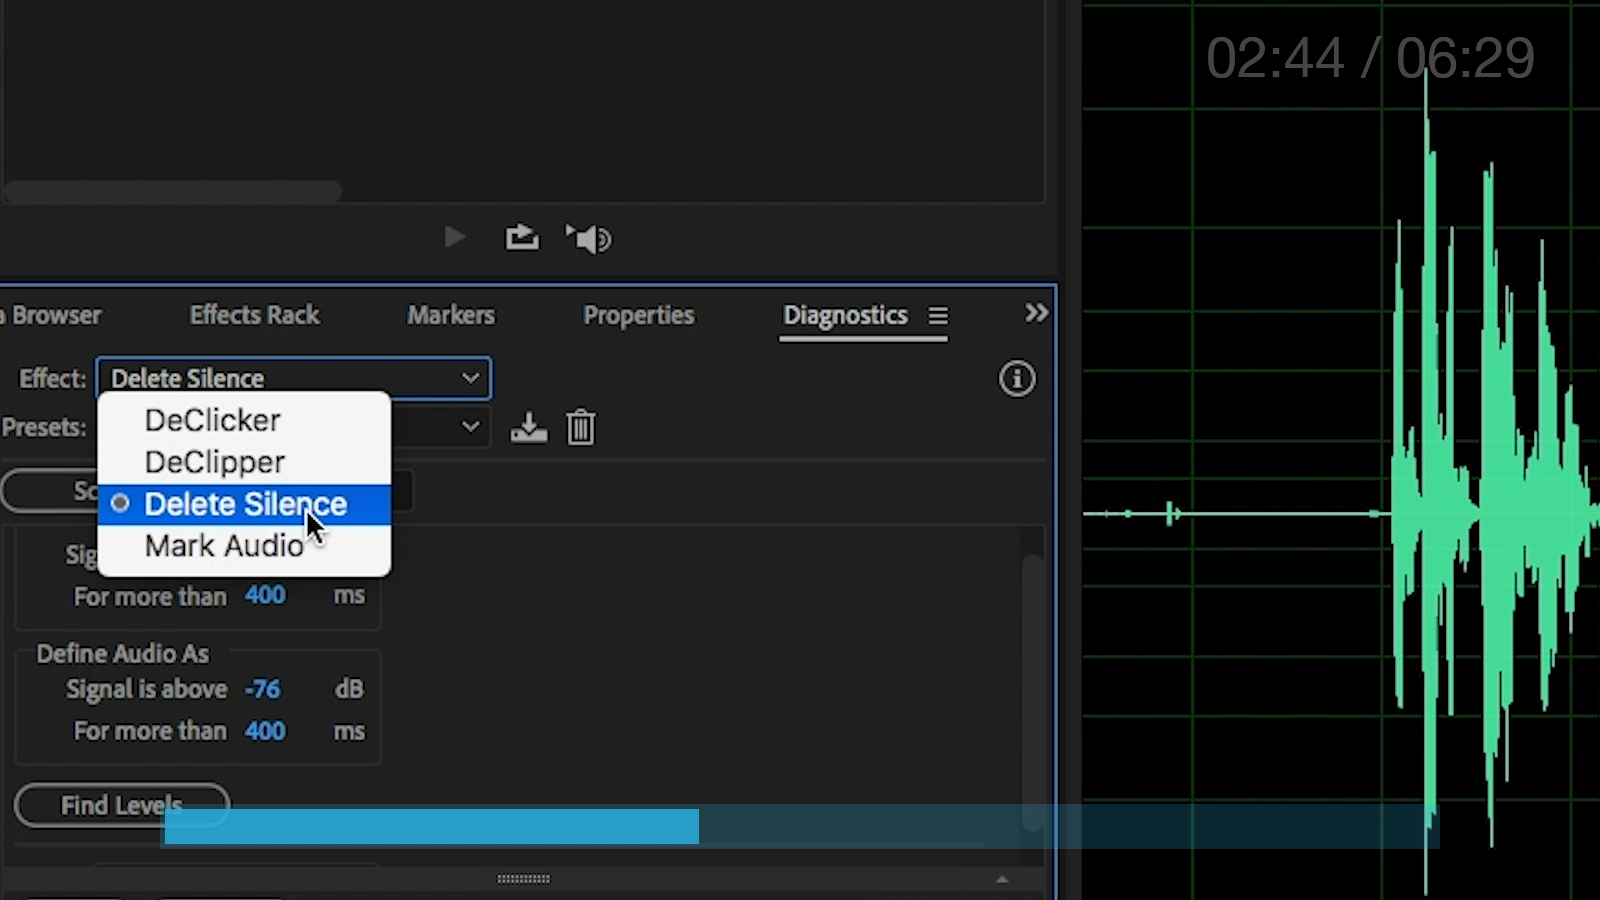
Next step. And this is a very important step. Go to diagnostics on the left tabs in Adobe Audition, And if you don't find it, go here
And select an area with the voice that you are talking in and find the level of the silence. It's auto-generated by press find levels.
Now we are going to deselect and scan. It's going to find the silence spots in your audio here. After that Everything is okay.
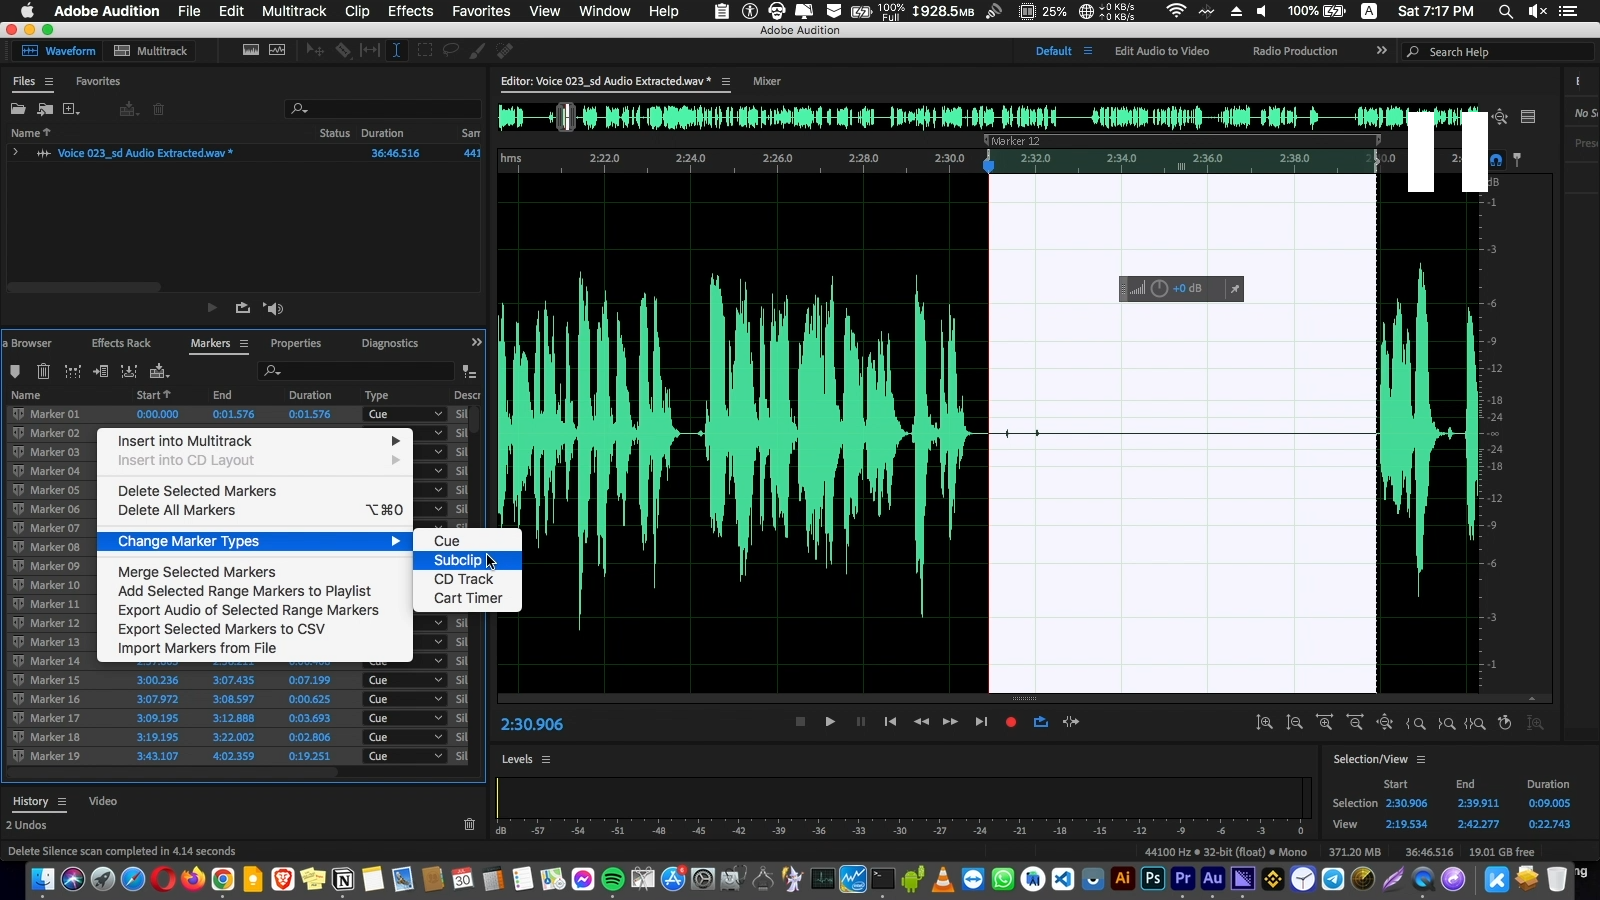
Now (command + A) and select all from the tab in the image and create a marker.
And go here to the markers tab, make sure that the first marker is a zero, the first one, and select all and change markers to sub clip and command + S and save.
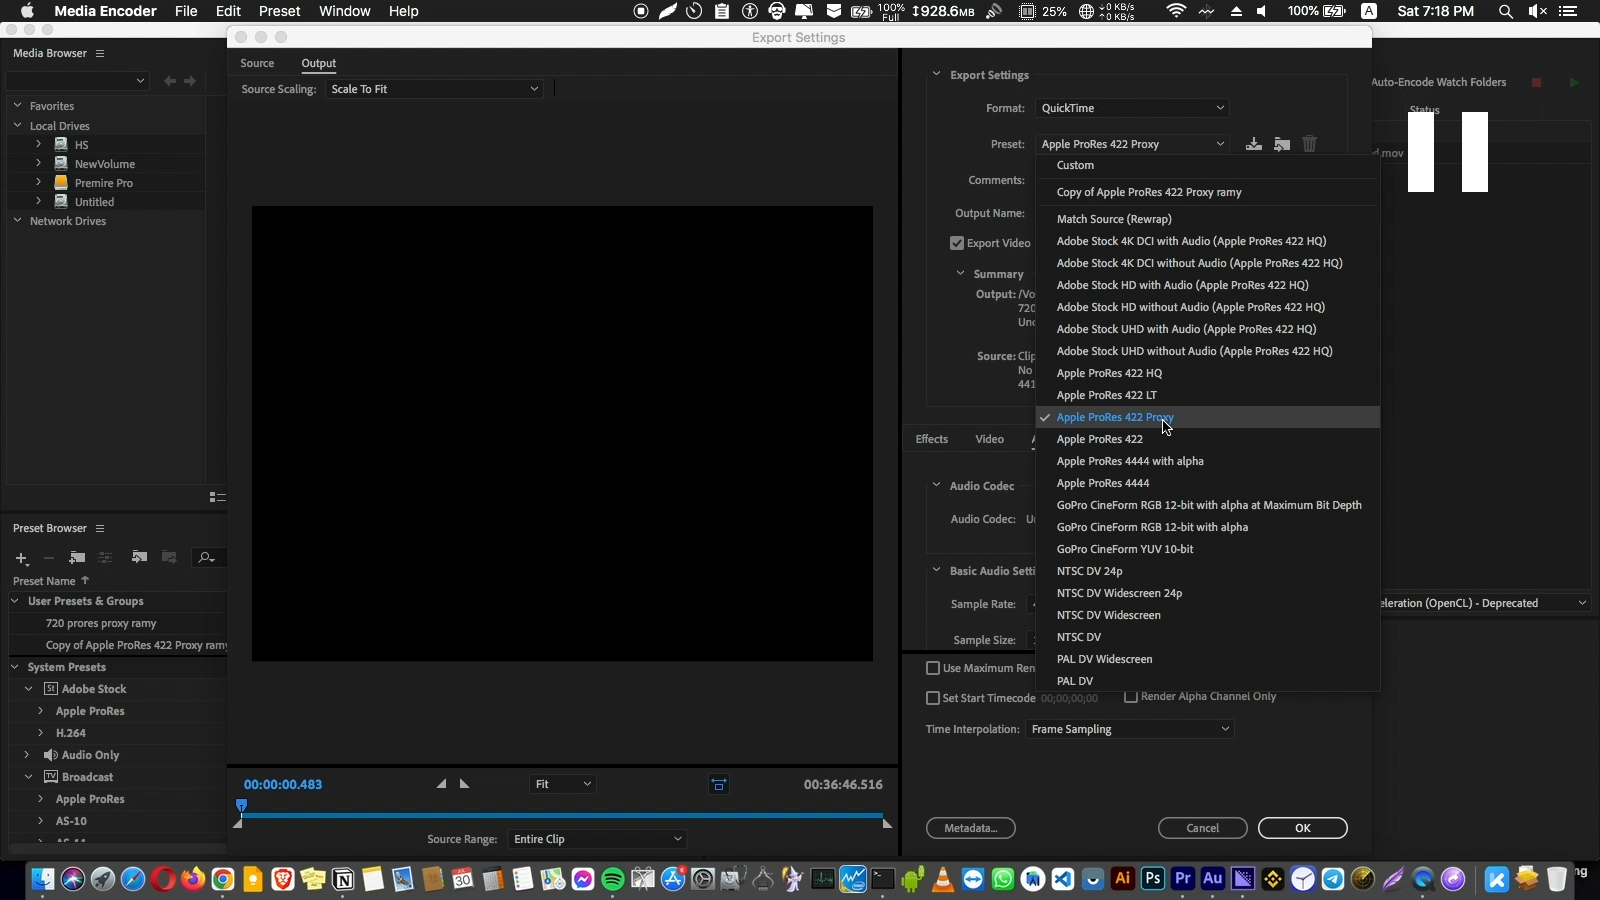
Now let's go to the media encoder, Now we want to create a video with this sound here, so let's choose this audio here. And select format Quick Time and select AppleRes pro 422 proxy.
And you can select whatever you want. And here I have a mono voice, make sure it's mono. So I'm going to select this, and select audio and set it at mono…ok…play!!
So let's wait till this is finished. now in premiere pro, we can go to our media folder and create a new folder and name it any name and open this folder, double click, and select the output of the media encoder. The video that we just created with this audio.
It's not just a regular video. It’s the full video followed by many versions or many clips that we are going to use as you see in the Tutorial.
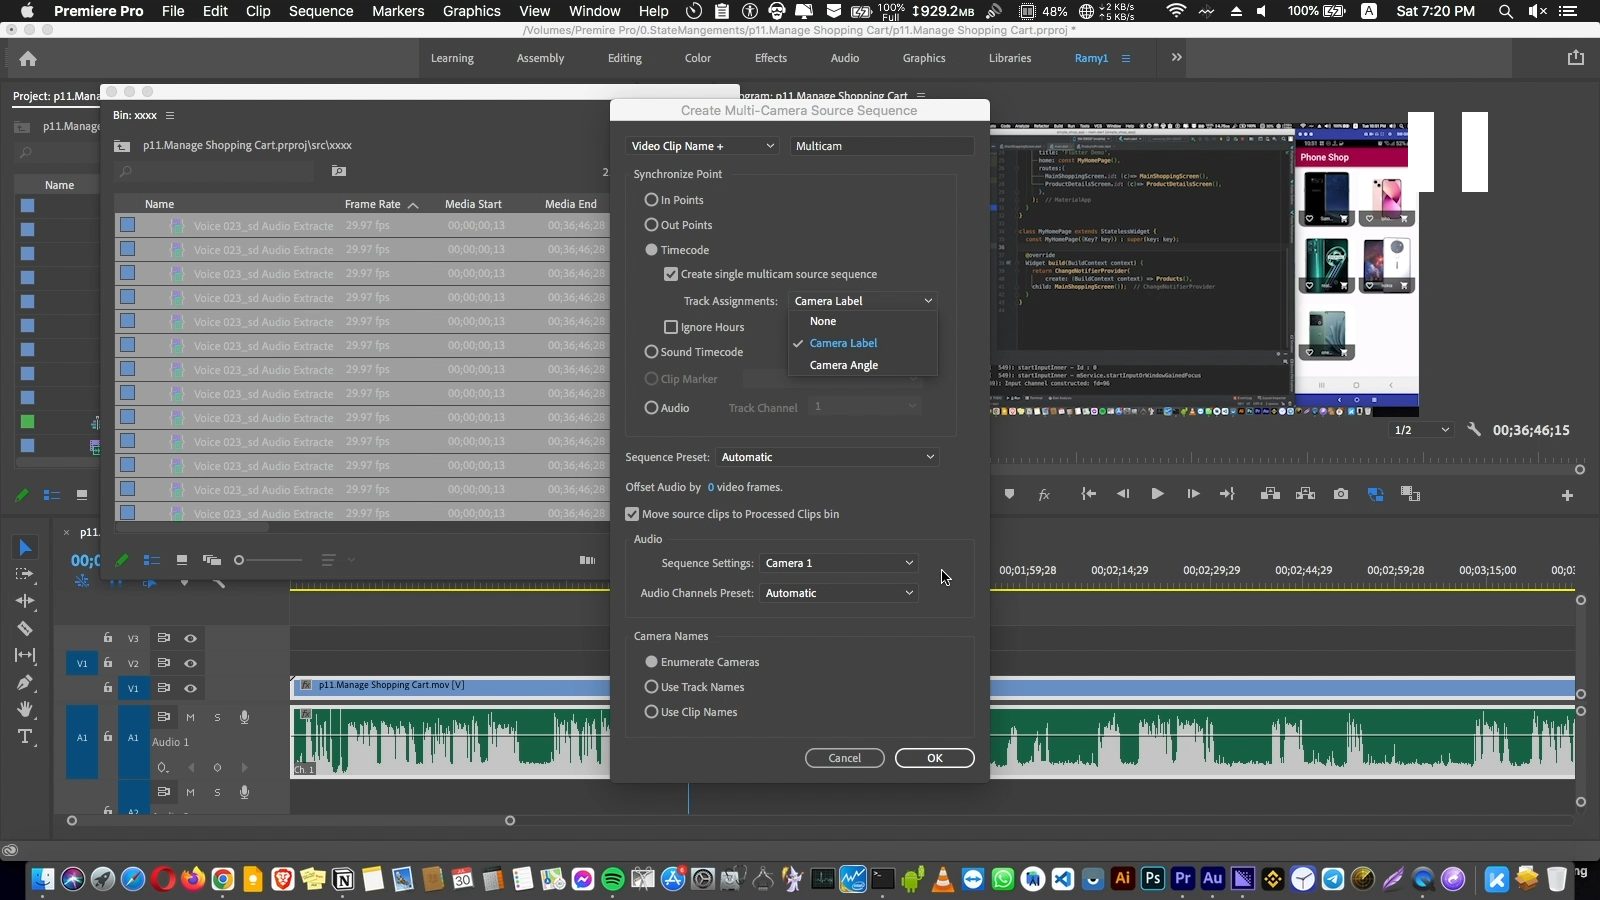
And we going to delete the first one as you see it's a different icon, let's delete the first one and select all and right click and create a multi-camera source.
And select the time could create a single Multicam and select a camera label, or a camera and press.
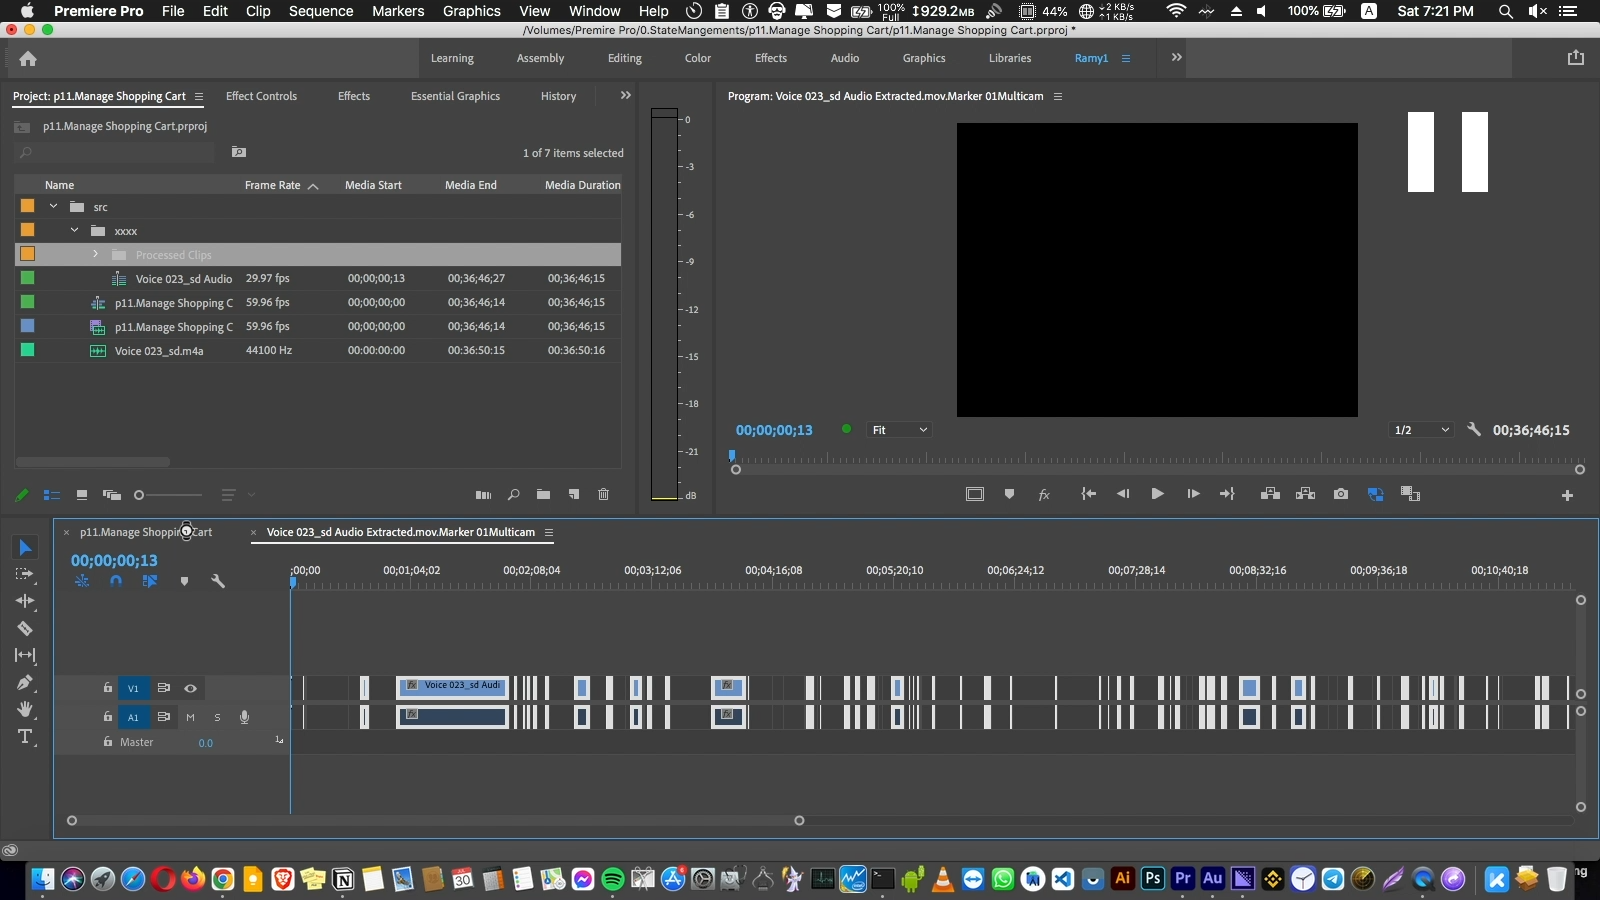
Okay, now we are going to have a new sequence. let's press command and double click, and you will find a new sequence with silence places or silence area.
So command a and select all and copy and go to our sequence and make sure it's in the beginning, ripple delete and get the slider in the first, or press just home, and make sure that V1 is selected and A1.
It should now select the area with silent spaces, which is going to delete them and go to a sequence tab and close the gaps.
Now you have your video. Now in 10 minutes, we just cut and edited every part of our videos. Now you can just press the arrow up and down and go to every part. And if you don't like this, just delete with a ripple delete and you can edit your video so, so, so faster.
Start editing your video so much faster. It's not just 10 times faster. It's 100 times faster, and I make this video to help you and help everyone. That making content on YouTube and editing your videos by premier and Adobe edition is going to make your video so much faster. and have very good quality audio.
And if you enjoy this video and learn one person's information from me in this video, just like this video and subscribe, I'm Ramy Wahid. I make flatter tips and tutorials and tips and tricks that make your life easier. Thank you. And I hope you subscribe and see you soon.


